

Christmas Cookie Decorating Games That Kids Actually Love: Creative Holiday Fun
This post contains affiliate links. As an Amazon Associate, I may earn a small commission at no extra cost to you. If you’re looking for christmas cookie decorating games kids love, this post will help you discover some fun options.
This post is about Christmas Cookie Decorating Games That Kids Actually Love.

Christmas cookie decorating games sounds magical until icing ends up on the table, sprinkles cover the floor and somebody declares their cookie ruined. Sound familiar?
I used to dread putting a group of children and a bowl of frosting in the same room. Then I discovered that a few simple Christmas cookie decorating games could turn the chaos into one of the most memorable activities of the holiday season.
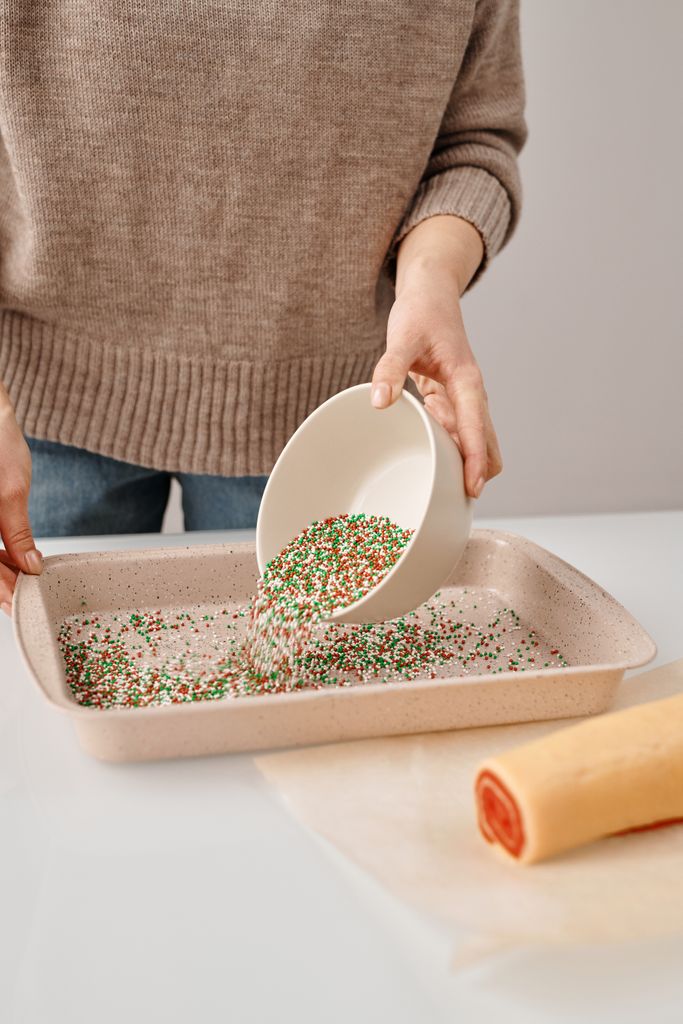
My first tip? Buy a big tub of mixed Christmas sprinkles. Trust me, having plenty of red, green and white decorations saves a surprising amount of arguing!
Whether you’re planning a Christmas party, a festive playdate or a cosy afternoon with the family, these seven easy games keep little hands busy and creative minds working. You don’t need fancy equipment, expensive kits or professional baking skills.
I’ll also share my favourite setup tips, simple frosting advice and a few useful supplies to make the whole experience easier.
Put the kettle on, grab the biscuits and let’s make some Christmas memories!

Quick Facts: Christmas Cookie Decorating Games With Kids
- Best for: Children aged 3–12, with age-appropriate adjustments
- Preparation time: Around 15–20 minutes, plus baking and cooling time if making cookies from scratch
- Activity time: Around 45–90 minutes, depending on the games you choose
- Ideal group size: 6–12 children
- Mess level: Moderate, but manageable with a little preparation
- What you’ll need: Plain cookies, icing, sprinkles, small bowls and a few festive decorations
Plan for around six cookies per child, plus a few spares. Some will be decorated, some will be eaten immediately, and a few will become what I like to call experimental masterpieces.
For an easier party, bake the cookies the day before and let them cool completely before decorating.

1. Christmas Cookie Decorating Matching Game
Ages: 4–8 | Time: 20–30 minutes
This game is perfect for children who enjoy copying patterns and getting the details just right.
What you’ll need
- Plain sugar cookies in matching shapes
- Ready-made icing in a few colors
- Sprinkles and other edible decorations
- Photos of sample cookies
How to play
Bake or buy cookies in pairs using the same cutter. Decorate one cookie from each pair as your example, using simple patterns such as red and green stripes, white icing dots or a row of colorful sprinkles.
Give each child a matching plain cookie and challenge them to recreate the design as closely as possible.
For younger children, keep the patterns simple. Older kids can try more complicated designs or copy from a photograph rather than looking at the finished cookie.
Here’s a little tip: take a photo of each example cookie before the game starts. It means children can check the picture without handling the original.
You can even turn it into a friendly competition, with awards for the closest match, the neatest design and the most creative interpretation.

2. Sort and Count Christmas Cookie Decorating Game
Ages: 3–7 | Time: 15–25 minutes
Who says learning can’t be part of Christmas fun? This simple game combines cookie decorating with counting, colors and sorting.
What you’ll need
- Plain cookies
- Bowls of colorful sprinkles
- Icing
- Number cards or small pieces of paper
How to play
Place each type of decoration in a separate bowl. Give every child a cookie and a little counting challenge.
For example:
- Ages 3–4: Add five red sprinkles to your Christmas tree.
- Ages 4–5: Make a snowman with three buttons.
- Ages 5–7: Create a pattern using two green sprinkles, one red sprinkle and two more green sprinkles.
Once they’ve completed their challenge, let them decorate the rest of the cookie however they like.
You can make the activity even more entertaining by appointing a Chief Sprinkle Counter to check everyone’s work.
And here’s a little secret: occasionally make a silly counting mistake yourself. Children love catching a grown-up getting something wrong!
Parent tip: For younger children, use larger, age-appropriate decorations and supervise closely. Avoid small, hard sweets that could pose a choking risk.

3. Christmas Cookie Relay Race
Ages: 5–12 | Time: 20–30 minutes
Got a group of energetic children who need something a little livelier? This team game brings plenty of excitement without requiring a complicated obstacle course.
What you’ll need
- One plain cookie per child, plus spares
- Icing and decorations
- Small trays or plates
- A table for each decorating station
How to play
Divide the children into teams of three or four. Set up a decorating station for each team with icing, sprinkles and other edible decorations.
The first player adds icing to their team’s cookie. They then return to their teammates, who take turns adding decorations until the cookie is complete.
For a longer game, give each player a different job: one adds icing, one creates a pattern, one adds the finishing touches and one presents the finished cookie.
Set a time limit and award points for teamwork, creativity and festive flair rather than simply rewarding the fastest team.
For younger children, keep the stations close together and have them walk rather than run. You’ll still get plenty of excitement without icing flying across the room.
Put on some Christmas music and let the teams choose a name. Rudolph’s Reindeer and Santa’s Little Bakers are always fun options!

4. Reindeer Cookie Contest
Ages: 4–10 | Time: 25–35 minutes
This is one of my favourite ideas because there really is no wrong way to make a reindeer. The sillier the result, the better!
What you’ll need
- Gingerbread people or reindeer-shaped cookies
- Brown, red and white icing
- Pretzel pieces for antlers, if age-appropriate
- Chocolate chips or suitable edible decorations
- Paper and pencils for naming the reindeer
How to play
Give each child a cookie and challenge them to transform it into a reindeer.
They can add antlers, a red nose, funny eyes or a festive scarf. Encourage everyone to invent a name and a little story for their character.
Perhaps Rudolph has lost his way, Prancer is wearing sunglasses, or Kevin the Reindeer simply refuses to pull the sleigh!
Once everyone’s finished, arrange the cookies for a mini Christmas exhibition.
Give out fun awards such as:
- Funniest Reindeer
- Most Colorful Creation
- Most Original Design
- Best Reindeer Name
- Most Festive Cookie
Make sure every child receives an award. The aim is to celebrate imagination, not decide whose cookie looks the most professional.

5. Christmas Cookie Decorating Game -Ornament Cookie Contest
Ages: 5–12 | Time: 30–45 minutes
Want an activity that produces something beautiful enough to photograph or give as a gift? Ornament-shaped cookies are a lovely choice.
What you’ll need
- Round or ornament-shaped sugar cookies
- Colored icing
- Christmas sprinkles
- Edible silver or gold decorations
- Ribbon for packaging or display
How to play
Give each child a cookie and ask them to design their own Christmas ornament.
They might create a snowflake, a traditional red-and-green pattern, a sparkling star or a colorful design inspired by their favourite Christmas jumper.
Older children can sketch their ideas on paper before decorating. Younger ones might prefer to choose three colors and make their own patterns.
When the cookies are finished, arrange them on a festive tray and let everyone show off their designs.
You could even turn this into a homemade Christmas gift activity by packaging the cooled cookies in food-safe bags or boxes.
If you want more ideas for decorating your home without spending a fortune, take a look at my guide to decorating a Christmas tree on a budget.
A quick note: If you’d like to hang edible cookies on a tree, make the hole before baking and handle the finished cookies carefully. For a simpler option, display them on a plate or package them as gifts instead.

6. Winter Village Challenge
Ages: 6 and up | Time: 30–45 minutes
This activity is ideal for children who love building, designing and creating their own little worlds.
What you’ll need
- Rectangular biscuits or gingerbread pieces
- Thick icing
- White chocolate buttons or other suitable decorations
- Edible sprinkles
- Plates or small trays
How to play
Challenge the children to build a tiny Christmas village using biscuits and thick icing as edible glue.
They can make little houses, snowy cottages, shops, Christmas trees or even Santa’s workshop.
Encourage them to add details such as snowy roofs, colorful doors and pathways made from icing.
For a group activity, give each child a different role. One can build the houses, another can decorate the trees, and someone else can create a village square.
Once everything is finished, bring the creations together on a large tray to make one magical Christmas village.
The walls might lean, the roofs might slide and the trees might look a little wonky. That’s part of the fun, luv!
Parent tip: If the children want to build upright structures, an adult can help assemble the pieces and allow the icing to set. Alternatively, let younger children create flat village scenes on their plates

7. Dice Roll Cookie Decorating
Ages: 5–10 | Time: 15–25 minutes
This is the perfect game for children who struggle to decide what to create when they’re faced with a table full of colorful decorations.
A dice does all the decision-making for them!
What you’ll need
- Plain cookies
- Icing in several colors
- Christmas sprinkles and edible decorations
- One ordinary six-sided dice
- A simple decorating chart
How to play
Give every child a cookie and use this chart to decide what happens next.
| Dice roll | Decorating challenge |
|---|---|
| 1 | Add red sprinkles |
| 2 | Add green icing |
| 3 | Add white icing dots |
| 4 | Add chocolate decorations |
| 5 | Make a silly face |
| 6 | Choose your own decoration |
Children take turns rolling the dice and adding the decoration that matches the number.
After six rolls, they’ll have a wonderfully random Christmas cookie. If the same number comes up more than once, they simply repeat the challenge.
For an extra twist, use a second dice with Christmas characters such as Santa, a snowman, a reindeer, an elf, a Christmas tree and a gingerbread person.
Whatever combination they roll becomes their secret design challenge!

How to Set Up a Christmas Cookie Decorating Party
A little preparation makes a world of difference. You don’t need a huge kitchen or a fancy baking setup; you just need a space where everyone can decorate comfortably.
Create simple decorating stations
Rather than putting everything in one crowded pile, arrange your supplies into a few stations.
- Icing station: Bowls of icing, spoons and child-friendly spreading tools.
- Sprinkle station: Small bowls of colorful decorations.
- Finishing station: Edible details, plates and boxes for finished cookies.
For a group of six to twelve children, you can create several small stations around one large table. Keep frequently used decorations within easy reach

Protect your table and floor
Cover the table with a wipe-clean tablecloth and secure the edges. Keep a rubbish bowl or bin nearby for wrappers and scraps.
Put paper towels, wipes and cleaning supplies within an adult’s reach, but keep cleaning products away from the food preparation area.
If you’re decorating on carpet, place a washable mat underneath the table. A few minutes of preparation can save you a much longer cleanup later.

Make the activity age-appropriate
Younger children usually enjoy simple designs, larger spreading tools and short rounds. Older children can tackle detailed patterns, team challenges and building projects.
Keep the sessions flexible, too. If a child wants to spend half an hour creating one magnificent gingerbread person, there’s no need to rush them through another game

Keep the atmosphere relaxed
Put on a Christmas playlist, offer water and have a snack ready before decorating begins.
It’s also worth reminding everyone that cookies don’t need to look perfect. Praise effort, imagination and kindness rather than comparing designs.
Planning a sleepover as well? Cookie decorating is a brilliant way to start the evening. My guide to sleepover ideas for every season has more activities to try.

Easy Frosting Tips for Decorating Cookies With Kids
The right icing makes decorating easier and helps children enjoy the process.
Choose an icing that suits the activity
Buttercream is easy to spread and works well for colorful, playful designs. For fine lines and detailed patterns, a thicker decorating icing or suitable royal icing may be a better choice.
For younger children, choose an icing that is easy to handle and provide small portions in separate bowls.

Get the consistency right
If your icing is too runny, it can slide straight off the cookie. If it’s too thick, little hands may struggle to spread it.
For buttercream, add a little icing sugar if it’s too soft, or a small amount of milk if it’s too stiff. Make adjustments gradually.
Royal icing behaves differently, so follow a reliable recipe and adjust its consistency according to whether you’re outlining, flooding or adding details.
If you’d like to try royal icing with older children, this MasterClass guide to making royal icing explains the different consistencies.

Keep colors separate
Give each child their own spreading tool and use separate bowls for different colors. This helps stop red, green and white icing turning into one muddy mixture.
Keep icing covered when it isn’t being used, following the recipe’s food-safety instructions.

The Cookie Decorating Essentials Worth Having
You don’t need to buy every baking gadget on the market. Start with the basics, then add a few extras if you plan to make cookie decorating a yearly tradition.
The essentials
- Plain cookies or ingredients to bake them
- Icing and food coloring
- Christmas sprinkles and suitable edible decorations
- Small bowls and spoons
- Plates, paper towels and a wipe-clean table covering
Useful extras
- Gel food coloring: Helps achieve vibrant colors without adding as much liquid as some other food colorings.
- Metal Christmas cookie cutters: Useful if you’re baking your own cookies in festive shapes.
- Silicone baking mats: Can help prevent cookies sticking to baking trays.
- A rolling pin with thickness guides: Handy for rolling dough evenly.
- Cooling racks: Useful when baking several batches of cookies.
- Icing squeeze bottles: Can make decorating easier for older children, provided the bottles are suitable for their age and ability.
If you’re keeping an eye on your December spending, you can skip most of the extras and still have a brilliant afternoon. My Christmas budget planner below can help you plan festive spending.
Is a stand mixer worth it?
A stand mixer can be useful if you regularly bake large batches of cookies or make your own frosting for parties.
A KitchenAid Artisan stand mixer is a possible long-term investment, but it isn’t necessary for this activity. A hand mixer or a sturdy mixing bowl and spoon will do the job perfectly well.
For most families, I’d spend the money on cookies, icing and plenty of colorful decorations first.
What to Do When Cookie Decorating Goes Wrong
Even the best-planned activity can have a few hiccups. Here’s how to keep things cheerful when they happen.
The icing is too runny. For buttercream, gradually mix in a little more icing sugar. If it’s too thick, add a tiny amount of milk. Other types of icing may need different adjustments.
Someone thinks their cookie is ruined. Offer a spare cookie and let them start again, or encourage them to turn the mistake into a new design. A blob of icing can become a snowdrift, after all!
The children argue over decorations. Divide popular colors and toppings into several small bowls before the activity begins. It helps everyone get a fair share.
One child finishes much earlier than everyone else. Keep a few extra cookies ready or offer a challenge such as creating a matching design, inventing a cookie character or making a Christmas scene.
The group starts losing interest. Switch to a different game, take a short break or let everyone show off their creations. Not every activity needs to fill the entire afternoon.
The room gets too messy. Pause for a quick tidy-up together. A little reset can make the rest of the party much more enjoyable.
And remember, the aim is to make memories, not produce a tray of perfect bakery cookies.

Turn Christmas Cookie Decorating Into a Family Tradition
Some of my favourite Christmas memories are the simple ones, especially decorating cookies and spending time in the kitchen with family.
That’s what makes these games so lovely. They give children a chance to be creative, work together and make something they can proudly show off.
You could choose one favourite game to play every December, take a photograph of everyone’s creations or save a little notebook of the funniest cookie designs.
Decorated cookies also make thoughtful homemade gifts. Package cooled cookies in food-safe boxes or bags and add a handwritten Christmas tag. For more inspiration, take a look at my guide to easy homemade Christmas gifts kids can make.
You could even tuck a cookie cutter or a festive baking accessory into an advent calendar using these advent calendar filler ideas.
Start with one or two games, keep the supplies simple and let the children take the lead. Before long, you might find that the annual cookie decorating afternoon becomes one of your family’s favourite Christmas traditions.
Frequently Asked Questions
What age is best for Christmas cookie decorating?
Children of different ages can enjoy cookie decorating with suitable activities and supervision. Younger children usually prefer simple designs and short sessions, while older children can enjoy detailed patterns, contests and building challenges.
Choose decorations and tools appropriate to each child’s age and abilities.

How long does cookie decorating with kids take?
Allow around 45–90 minutes for a party that includes several games, plus approximately 15–20 minutes for setup and extra time for cleanup.
For younger children, shorter activities with breaks tend to work best.
How many cookies do you need per child?
Around six cookies per child is a useful starting point if you’re planning several games and want some to eat or take home. Have a few extras available in case cookies break or children want to try another design.
What supplies do you need for cookie decorating games?
You’ll need plain cookies, icing, colorful sprinkles, suitable edible decorations, bowls, spoons and plates. Table coverings, paper towels and a few spare cookies are also useful.
You can keep things simple with supermarket ingredients rather than buying a dedicated decorating kit.
Can you make cookie decorating games nut-free?
Yes, you can choose ingredients and decorations that don’t contain nuts, but check the labels and allergen information for every product, including cookies, icing, sweets and sprinkles. Manufacturing and cross-contact warnings matter, too.
If you’re catering for a child with a nut allergy, ask their parent or carer about their requirements and follow their guidance. Don’t describe the activity as allergy-safe unless the ingredients and preparation arrangements have been checked appropriately.

Can you prepare Christmas cookies in advance?
Absolutely. Bake the cookies a day or two ahead, allow them to cool completely and store them in an airtight container. Prepare your decorating stations shortly before the activity begins.
If you want to make the day even easier, portion the sprinkles into small bowls and prepare any icing that can safely be made in advance according to its recipe.

What is the easiest Christmas cookie decorating game?
Dice Roll Cookie Decorating is a great option for beginners. Children don’t need to invent a design themselves; they simply roll the dice and follow the matching instruction.
It’s inexpensive, easy to explain and works well for small groups or larger Christmas partie.
Well, go on, mi darlin, get the cookies out and let the fun begin.